The Artist's Color Palette
Transform a mundane yard into an oasis by using an artist’s color palette
by Monica Schmid
As an artist, I’m keenly aware of the relationship between shapes, colors, and textures – in essence, the principles I use when I work in my studio. Using these elements to create my garden space has transformed my “yard” into a sanctuary. The garden is my canvas, the colors of the foliage and flowers are my palette. By sharing my approach to create a cohesive garden, I hope to encourage the artist in you.
Choose the Colors
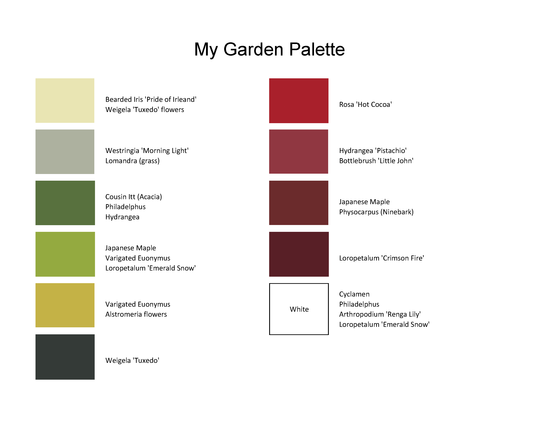
The first step to plan a garden is to decide on a color palette for the flowers as well as colors for foliage and accents. Some of my gardener friends were surprised at the notion that foliage and bark are strong, colorful statements that endure after flowers have gone.
Plan the Space
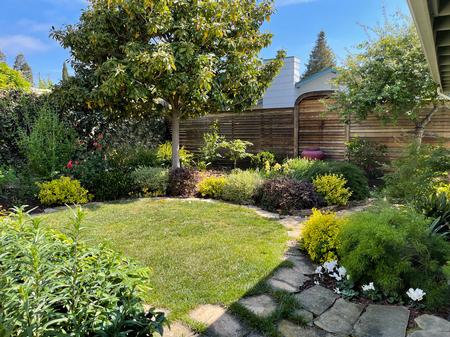
Start by making a plan and divide the garden space into three sections, front row, middle section, back row. Work on each section separately because each one has a specific function.
- Front row - to create a cohesive first impression all year long
- Middle section - to give splashes of color, to add specimen plants, annuals
- Back row - to frame the garden
Color Palette for Foliage
The colors of flowers and the foliage palette play equally important roles in adding interest. Choose foliage for its color and provide an opportunity to use the “garden” paintbrush. Remember, the colors of green can run from yellow to chartreuse to dark green and from bronze to silvery gray.
Color Palette for Blooms
Choose colors that speak to you, colors you wear often and feel most comfortable in. Think about the colors you like to surround yourself with. Do you have a favorite painting, perhaps Van Gough’s Starry Night in blues and bright yellows? Do vibrant colors make you feel alive and happy? Or are you drawn to muted pastels that evoke a soft atmosphere? Or do you prefer a monochromatic palette that evokes serenity and calmness?

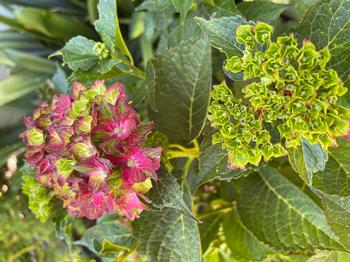
The photos above illustrate the color progression from pale to intense yellow-green, from green to red in the hydrangea and ultimately to the smokey-red of the rose. The rose matches the color of the inspirational urn.
Front Row - Foliage
The front row should host low evergreen shrubs. Some of my favorites for the foreground are variegated Euonymus, Loropetalum, Westringia, boxwood, ‘Cousin Itt’, dwarf bottlebrush ‘Little John’, mondo grass, and many more. The secret to creating a cohesive appearance is to limit the type of shrubs to a select few, rather than introducing many different kinds. Ideally, each foliage color is repeated in at least three places. Juxtaposing evergreen shrubs in a variety of colors in the foreground creates a solid foundation and keeps a garden green all year long. The foliage adds vibrancy even during the grayest winter days. The shrubs will also serve to hide plants in the middle section that have lost their luster after bloom.

Middle Section - Texture and Color
The middle section is the place for specimen plants and patches of flowers. Use an abundant selection. The only criteria is to stay within your chosen palette and select plants that will grow at least one foot higher than the front row foundation plants.
Adding color and interest in deep shade is often a problem. I found Arthropodium (Renga Lily) and Clivia to be reliable performers and because of their low water requirements, they are well suited as underplantings of large tree canopies. Be sure to plant them away from the tree trunks.
Pay attention to texture as well. Long, strappy leaves of irises for example create a lovely contrast to plants with large leaves, such as Acanthus.
Back Row - Framing the Garden
Choose taller plants for the background so they will frame the planting area and create depth. Again, adding interest with a variety of foliage colors and a mixture of deciduous shrubs such as Ribes, ninebark, Philadelphus, Japanese maples with species of the evergreen Pittosporum, Ceanothus, Michelia, Carpenteria California, and many more, the garden will never look boring.
Selection Process
Once the color scheme is finalized the real fun begins. Remember to stay with the chosen color range. You may be tempted to add too many colors.
Start the online search for plants of the colors you have chosen. If one of the colors is red, search for “red flowers” and click on “Images”. A whole world of possibilities opens right on your desktop! Let the artist in you speak. Be bold. Scroll through the pages and take screenshots of the ones you like. As long as you stay with the color scheme you will end up with a coherent garden. Select red flowers that complement each other. A red Hydrangea with its blooming orbs and large green leaves pairs well with a crimson maple. Crocosmia with its long strappy leaves adds interesting texture and its flowers bridge the palette from red to orange and to yellow. Repeat this process with each color in your palette. No matter what colors you choose, be sure to add white and silvery green for an intense glow during the evenings and at night.
Once you have identified specific plants that could work, do the research and select the plants best suited for your environment and for your set criteria. Choose the search sequence that suits you best, but always stay within the chosen color range. Do a search for each color in your palette. Consider:
- Color
- Environment, sun or shade
- Focal point, a specimen plant
- Water-wise
- Category, such as native, Mediterranean, tropical, mixed, etc.
- Pollinator-friendly
Placement
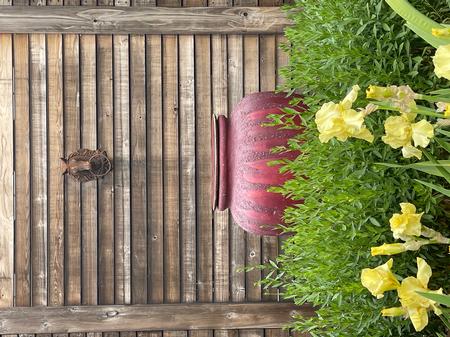
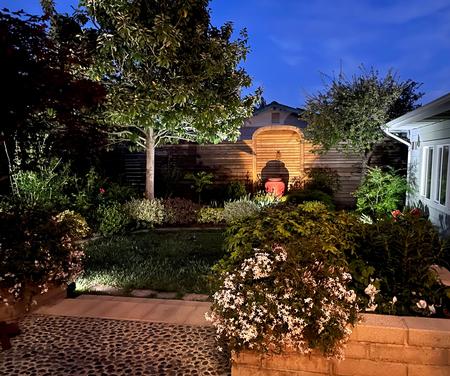
Example - My Garden
Our Help Desk Knows Ornamental Plants Too
Looking for help selecting ornamental plants that perform well in Alameda County or want more information? Email us at acmg@ucanr.edu. Or contact us through our website http://acmg.ucanr.edu/Contact_Us/ .
Related Links
- Find outstanding plants for Alameda County - http://acmg.ucanr.edu/Outstanding_Plants_for_Alameda_County/
- Outstanding perennials for Alameda County - http://acmg.ucanr.edu/Outstanding_Plants_for_Alameda_County/Perennials/
- Outstanding shrubs for Alameda County - http://acmg.ucanr.edu/Outstanding_Plants_for_Alameda_County/Shrubs/

