Plant Perennial Vegetables in Winter
Perennial Vegetables - Winter Planting
by Linda Carloni
Why plant perennial veggies, and are there drawbacks?
Pros
Less Work – This (and deliciousness) is my number one reason to grow perennial vegetables. With perennial vegetables, you plant once, and harvest over many years. Some annual maintenance is required, but generally not as much as for annuals.
More Sustainable – Because perennials’ root mass becomes much bigger than annuals’, the roots can reach water and nutrients and thus typically require less water and fewer nutrients than many annuals. (Of course, for every rule there are exceptions – watercress and wasabi both require a lot of water.) Because the soil is not disrupted every year, the health of the soil microbiome can be preserved more easily. The roots (and frequently leaves) of perennials are present year-round and protect the soil from erosion year-round.
Fall/Winter Planting - Most should not be planted in summer, and many give you the chance to plant in the winter here in the San Francisco Bay Area.
These benefits of perennial vegetables frequently make them a part of a permaculture garden.
Cons
Calls for Thoughtful Planning; Limits Flexibility – The goal is for your perennial veggies to take up their space in your garden (and produce food for you) for a long time. So, it’s important to think carefully in advance about where you plant them. The space needs to have the necessary sun exposure and access to irrigation and be of a compatible soil type (or be sufficiently amended), plus you need to be willing to dedicate the space to the perennial for many years.
Patience Required – With many perennial vegetables, you will need to wait longer to get an edible crop. Asparagus is a prime example; it should not be harvested at all until the third spring.
Can Draw More Pests – Because the perennial will be in one place for years, it can’t take advantage of the pest-suppressing benefits of crop rotation. While the long-lasting roots do a great job of keeping the soil and its ecosystem intact, they can also attract root pests, like gophers.
Note: This article does not cover perennial leafy herbs. They deserve a post of their own.
If you want to try out perennial vegetables, there are many to choose from. Here are some to consider, in alphabetical order:
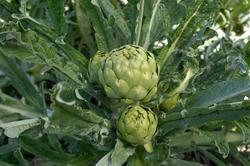
Artichokes
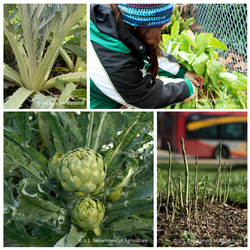
Artichokes were long grown in the Mediterranean before they were introduced to California in the 1800s. They are particularly well suited to the coastal regions of Northern California; Monterey County produces more than half of the artichokes grown in California.
Planting: Historically, artichokes were grown from rootstock (bare root or planted in pots) in cool-summer, mild-winter areas as perennials. Varieties are now available that can be grown as annuals (in particular, Imperial Star), allowing artichokes to be grown in other areas, like Southern California. This post discusses artichokes grown as perennials.
Artichokes are large plants, and perennials (at 3 to 4 feet wide and high), are generally bigger than the annuals so give them plenty of room. Rootstock is best planted from October to December. Space plants 3 to 4 feet apart. Artichokes like at least 6 hours of sunlight, including at least some direct sun in the winter. The soil needs to drain well and should be well amended with compost before planting. Some slow-release fertilizer at planting is also a good idea.
Maintenance: When the artichokes are actively growing, a high nitrogen fertilizer will help them thrive. In the summer, heat will cause dormancy; the plant does not need irrigation when dormant. Otherwise, they need water. After the last bud on a stalk is harvested/bloomed, cut the stalk down to just below the ground, at an angle. You may need strong loppers to do this!
Harvest: Buds are generally ready to harvest in late winter/early spring starting in their second year. Buds should be harvested when very firm, with a sharp knife, leaving a short stalk. Buds are typically harvested just as the tips of the lower bracts start to lift up. They can be harvested earlier, when completely tight, for baby artichokes. You can leave some side buds uncut after your harvest to get a lovely flower. (Note: allowing a bud to flower will inhibit the rest of the plant from making more buds, so only do this when you are done with your harvest.)
Pests: Artichokes can be very prone to aphids. Monitor frequently and control them as early as possible by washing off the buds and leaves with a strong stream of water. The aphids are hard to control once they get under the bud scales. Gophers can also be a problem. For gopher-prone areas, precautions when planting may be needed. Info on managing artichoke pests.
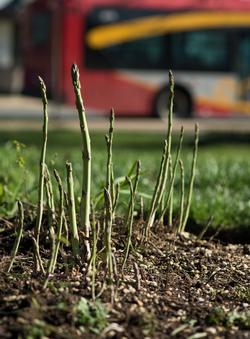
Asparagus
Asparagus grows well in cool, humid summers, and thrives in the more coastal regions of Alameda County. With luck, your asparagus plants will produce harvests for up to 15 years in the same spot, with relatively little care. And to me, it always means spring when the asparagus is in!
Asparagus takes careful soil preparation and patience and a good harvest takes a lot of room. Each plant only needs an area of 1.5 by 1.5 feet, but each plant only makes a few stalks at a time, so it’s recommended that you plant 5 to 20 plants per asparagus eater! 20 plants need 45 square feet, or a bed 3 feet by 15 feet.
Planting: In Alameda County, asparagus crowns are planted from January through March. Generally, gardeners use crowns (one year old roots); seeds are less expensive but can be tricky to get established. Crowns are widely available; consider varieties that are resistant to fusarium and rust if you can find them.
To plant crowns, wait until the soil is dry enough to dig during the January - March period, and dig a trench a foot or so deep and about a foot wide. Make small mounds every 18 inches or so to create raised places for the crowns to sit on. Put down a few inches of compost or well-rotted manure over the bottom of the trench, including the mounds. Consider adding an additional slow-release fertilizer if your soil is sandy and drains of nutrients quickly (as in the City of Alameda, where I live). Put down another couple of inches of soil. Your objective is for the tops of the mounds to be around 6 inches below the soil surface at this point, so adjust your trench depth and level of compost/manure to achieve this. Place each crown on a mound, and cover with an inch or two of soil; level the trench at about 4 inches below the soil surface. Fill the trench in gradually as the plants sprout and grow bigger. The soil should be level with the rest of the surface by next winter. (These directions assume you don’t have heavy clay soil or other soil that stays wet, which requires a modified technique).
Maintenance: Keep the soil moist and the bed free of weeds the whole first year. When the plants have come up well, you can mulch, which will help keep the weeds down. Apply a high-nitrogen fertilizer before the plants start to produce each season.
Harvest: Don’t harvest the stalks for the first two springs, let them leaf out and become ferny. The third spring after planting, you can start to harvest, but only for two or three weeks. The fourth spring, you can harvest for 6 to 8 weeks, and in later years for 2 months or until the largest spears become thinner than a pencil, whichever is sooner. In each year, stop harvesting as noted above and let the plants fern out. The ferny green growth is needed to nourish roots and rhizomes to support the next spring’s crop. In the fall or winter, the plants will die back; cut the stalks off at the soil surface after the plants turn brown.
Pests: Asparagus is not particularly prone to pests in our region, but it is susceptible to fusarium, a soil fungus; rust, a fungus that attacks the above-ground parts of the plant, and a few insects. Info on managing asparagus pests.
Bunching onions (aka Scallions, Welsh onions, Japanese bunching onions)
Many green onions sold in the supermarket are a variety of bulbing onions (Allium cepa) planted very thickly and then harvested whole before much a bulb forms. But a related species of green onion, Allium fistulosum, forms a clump that can be grown perennially.
Planting: Seeds can be planted outdoors from spring through early fall. Mature clumps should be separated by 6 to 8 inches, but they can be started much more closely, and then separated by fully pulling the smallish green onions to get the separation needed for the clumps.
Maintenance: Weed often, especially when the plants are small. Mulch can keep the weeds down and the moisture in. The soil should stay moist but not wet. When a clump becomes large, dig it up in the fall, divide the clump and replant. Cut off flowering stalks before they bloom so that the plant puts its energy into multiplying rather than blooming.
Harvest: Harvest when you need some onion flavor, so long as the greens are at least ¼ to ½ inch in diameter. The plant is likely to be dormant and not productive in the winter. When you harvest, you can remove onions one at a time from the edge of the bunch, but you may need to remove some soil next to the clump to do so. You can also just cut off the tops, leaving the bulbs. Be sure to leave some of the clump so that the plant will continue and multiply.
Pests: Bunching onions can fall prey to the same diseases as bulbing onions. Info on managing onion pests.
Horseradish
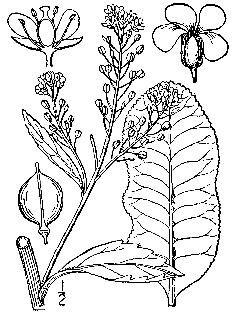
Planting: Horseradish requires well-amended fertile soil, like most of the perennials discussed here. It is generally planted in the Bay Area in February, from root cuttings, which are cut flat on the top and at an angle on the bottom. The roots should be set top side up, at a 45-degree angle in the soil, with the top about 3 inches deep, at least 15 inches apart.
Maintenance: Irrigation is needed in dry seasons. Horseradish requires a lot of potassium, so while Bay Area soil generally has plenty of potassium, it may be needed here, especially where the soil is sandy. You can add potassium though kelp meal or greensand. Take care not to add too much nitrogen, because you want to encourage root growth rather than too much leafy growth.
Harvest: Try harvesting in November after a spell of cold weather. If it is not sharp enough, delay harvesting the rest for a month or so. If you want the horseradish to be a perennial, leave some roots in the soil, and you’ll get horseradish the next year. If you want to use the plot for something else, be sure to get every bit of root matter out of the soil – it doesn’t take much for it to multiply and become invasive.
More information on growing horseradish
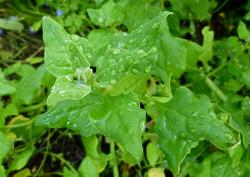
New Zealand spinach
New Zealand spinach (Tetragonia tetragonioides) is not a true spinach, but it tastes similar. It is high in vitamins A, B1, B2, and C and is said to be one of the plants that saved Captain Cook and his crew from scurvy. It tolerates warm weather much better than true spinach. Sometimes grown as an annual because it is easily damaged by frost, in the frost-free areas of coastal Alameda County, it grows well as a perennial. It can be cooked or used raw in salads, as with standard spinach.
Planting: New Zealand spinach prefers fertile soil, but it isn’t really picky. It will work in a wide variety of soil situations. Soak seeds in water for 24 hours before planting to improve and speed up germination. Seeds should be sown ½ inch deep and can be planted directly outside in early spring after the last frost date. Seeds can also be started inside and transplanted out after they reach 1 to 2 inches tall. Seeds take up to 2 or 3 weeks to emerge and do not emerge uniformly. Keep the soil consistently moist until the seeds emerge. Thin to 12 inches apart. Seedlings can be transplanted when they are 1-2 inches tall.
Maintenance: Weeds can be a real problem, especially when the plants are young. Mulches will help suppress them, as well as keeping in soil moisture. Once the plant starts to spread and fill in, it can choke out most weeds on its own. New Zealand spinach does appreciate supplemental nitrogen. The plant is drought tolerant once established but will taste better with irrigation.
Harvest: New Zealand spinach forms runners. To maintain as a perennial, once the plant has reached a spread of 1 foot or so, harvest the 2 or 3 inches at the end of the branches (tender shoots, tips, and leaves) with a knife. Harvest frequently to encourage new growth, which tastes the best. Once the plant has bloomed and has formed knobby seedpods, the taste and texture will diminish. Cut back to a foot in late summer to encourage new growth.
Pests: New Zealand Spinach has very good disease and insect resistance. Leaf miners are a common problem in growing regular spinach, but rarely attack New Zealand spinach.
More information on growing New Zealand Spinach
Rhubarb
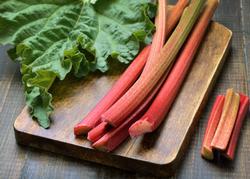
Rhubarb grows well in Alameda County, especially along the coast. It does best where the average summer temperature is less than 75 degrees. It originated in Central Asia, came to the West with Marco Polo and was brought to North America by Benjamin Franklin. It’s most often enjoyed in pies and crisps. It is popular in Iceland, where it features in the very common (and delicious) Happy Marriage Cake.
Rhubarb is a big plant! Clumps can grow up to 2 ft. high and 3 ft. wide with the stalks 18 in. long and 1-2 in. wide. Rhubarb does best in climates with colder winters than ours but will produce here with a low-chill variety such as Red Cherry or Giant Cherry. The stalks will not be as thick as in cold winter climates, and the stalks may not have the deep red color, but the color does not affect the flavor. Rhubarb leaves and roots are poisonous due to oxalic acid, so be careful to only use the stalks.
Planting: Plant in well-amended fast-draining soil. Plant in winter (December to March) from bare root divisions or divisions from older plants. Bury roots with the crown bud 2 in. below the soil surface. If you are using a plant, put it at the same level as it has been growing. Space roots 24 to 36 inches apart. Rhubarb will do fine in cooler parts of your garden and will tolerate some shade.
Maintenance: In late fall or early winter, fertilize with a balanced fertilizer and spread compost over the root area. Keep weeds out. The plants grow vigorously into early summer when they become dormant until the winter rains come. Plants can be protected in the winter with a mulch of leaves or compost 2-3 in. deep.
Divide clumps every 5-7 years to keep the plant vigorous. When the plant is not getting enough nutrition, rhubarb shoots up big stalks of white flowers. Cut them down as soon as you see them. In the fall, divide the plant, making sure to keep 3-5 buds in each crown. The divided crowns may take a few years to come back to full productivity.
Harvest: Rhubarb is harvested in spring, possibly late winter if growth resumes early. Do not harvest in the first year; let the plant grow and nourish the roots. The second year, pull stalks from the crown to harvest one light picking the second year if the plant is vigorous. After that, so long as the plant is robust, you can harvest for about 2 months by pulling and/or twisting, not cutting, the stems. Take care not to damage the crown. Cutting the stock will leave a stump that may rot.
Pests: Rhubarb is generally resistant to pests.
More information on growing rhubarb
Sorrel
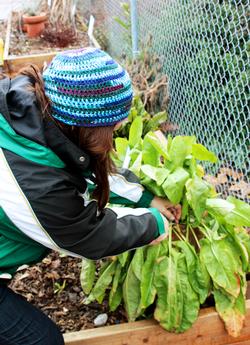
Planting: Sorrel can be planted from seeds or seedlings. You’ll probably only need one plant, because they grow quite large and can be harvested most or all of the year in Alameda County’s climate. So, it may be easiest to buy one seedling from the nursery. Generally, plant in the spring, after the last frost date. In coastal areas, while planting in spring or fall is best, you can plant it all year. Once again, plant in well-amended soil well-cleared of weeds. Space the plant one to one and 1/2 feet from other plants on all sides.
Maintenance: As usual, keep the plant free of weeds. It will require moist soil to get established, but you can cut back a lot on the irrigation once it is established. Cut back whatever flower stalks emerge to keep the energy going into leaf production.
Harvest: Harvest infrequently and only a few leaves at a time until the plant has 2 or 3 dozen leaves. After that, the plant can be harvested frequently. The young tender leaves taste best, especially for uncooked dishes.
Pests: Snails, powdery mildew and leaf miner can be problematic.
Sunchokes
These easy-to-grow tuberous vegetables are also called Jerusalem artichokes, though they seem to have no particular connection to Jerusalem. The sunchoke name seems much more suitable, since they greatly appreciate a sunny spot; they are in the same genus as the sunflower. Native Americans introduced European settlers to the tuber. The settlers took some back to Europe, where they were cultivated and adopted, and they were later re-introduced to the United States. Their taste is described as between an artichoke and a water chestnut.
Planting: Sunchokes should be planted in March or April, from tubers. Tubers can be purchased online, or you can plant tubers from the grocery, so long as they still have their buds. Large tubers can be cut in half for planting, but the pieces each need to have 2 buds and to be at least 1 ½ inches in diameter.
Sunchokes can be very invasive. If any piece of tuber remains in the plot or gets moved to a new place it will grow again the next year. Planting them in containers can confine them to their designated place; containers need to be at least 5 gallons. In the ground, tubers should be planted 2 inches deep. In containers, plant 4 to 6 inches deep and bury the pot into the ground up to one-third of its depth to give the plant stability – they grow 10 to 12 feet tall. The tubers should be set one foot apart.
Sunchokes are very productive, so you may want to start with 2 tubers per eater until you know how much you like them.
Maintenance: Water well all summer. Small yellow flowers (like sunflowers) may bloom, but are not needed for roots to form.
Any root parts left in the ground are likely to sprout again the following spring, so the plot or container can quickly become too crowded. To prevent this, harvest any roots left in March, choose good firm unblemished specimens, and replant them.
Harvest: When the leaves begin to turn brown, likely in October, you can dig the tubers and start eating. Until you are ready to eat them, they will store best underground. Leave some stems in place so you can find them. If you are not familiar with sunchokes, here are recipes for a side dish and a soup and sunchoke chips. They can also be roasted or mashed, like potatoes.
Pests: Sunchokes are quite pest free in Alameda County.
More information on growing sunchokes.
Tree Collards
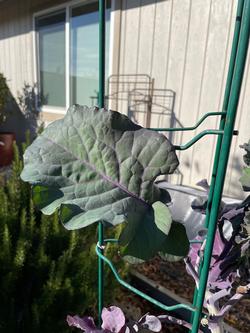
Planting: The plant grows best from cuttings, which can be challenging to locate. They can be found online, and sometimes in specialty nurseries. Plant in an area with 4 to 5 hours of sun, in fertile soil. which can be found with a bit of searching at smaller specialty nurseries and online plant suppliers. Cuttings are usually planted in February. If you are using unrooted cuttings, simply make a fresh slanted cut at the bottom of the cutting and place it several inches down in a container with good-quality potting soil. It should be established in 6 weeks or so. You can also just plant them directly into the ground.
Two varieties have local associations: Merritt hybrid tree collards were developed at Merritt College and Purple Tree Collards were made the official green of the City of Richmond in 2010.
Maintenance: Water evenly, especially when the plant is young. Cut back perennials in late summer. You may need to stake the plant to keep it upright.
Harvest: Harvest after the plant has had time to become well-established. Then you can harvest whenever it isn’t going to seed. Leaves are sweeter in cool weather, and the young leaves are the sweetest and most tender. If you harvest the leaves from the bottom up, you’ll get more of a classic tree form.
Pests: All collards are unfortunately subject to the same pests as other brassicas (broccoli, cabbage, kale, etc.), which are more of a problem in warm weather than cool. Information on managing brassica pests.
Others
The vegetables described above are the most well-known that grow well in Alameda County, but there are others:
Wasabi: Sometimes called Japanese horseradish, wasabi is a semi-aquatic plant, which grows in nature along cool streams in heavily wooded areas. If you can replicate those conditions year-round in your garden, your wasabi will be the happiest. Growing wasabi
Prickly Pear: Prickly pear cactus grows well in the Bay Area, requires little water, and produces edible pads and fruits. Growing Prickly Pear.
Oca: Not well-known in North America, oca has long been grown in the Andes and is popular throughout South America. It tastes like a tangy potato, but its texture is more like cooked winter squash. Growing oca
Walking onions. (Also called Top Onions and Egyptian Onions). These perennial onions form bulblets at the top of their stems which sometimes fall over and root themselves in a new location, “walking” along the plot. These are generally used for green onions, as the mature bulbs can be very hot. Growing walking onions
Perennial arugula: Sometimes called wild arugula or sylvetta, this is a different species (Diplotaxis tenuifolia) than the more common annual (Eruca vesicaria spp. sativa). It has small, deeply lobed dark green leaves and is slow-growing and slow to bolt. Cut back the flowering stems to direct energy to the leaves. Self-seeds readily and can become invasive. Small leaves taste best, larger leaves can be bitter.
Cardoons: 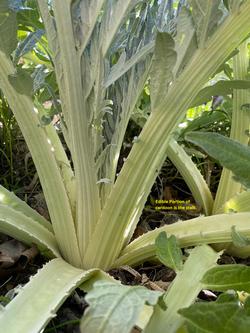
Cautions for unfamiliar vegetables
Overall, vegetables are a great source of vitamins, minerals and fiber, all important components of nutrition. But they can also contain compounds that cause issues for some. For the vegetables listed in this article, you may want to consider:
Oxalic acid: Sorrel (especially red-veined sorrel), rhubarb stalks and New Zealand spinach are all high in oxalic acid, which some people avoid for medical reasons. Rhubarb leaves and roots have toxically high amounts of oxalic acid and should be avoided by all.
Inulin: Sunchokes contain inulin, a prebiotic fiber, and can cause gas in some people. Harvesting after frost may reduce this, as may cooking.
Welcome to the wonderful world of perennial vegetables!
Almost any gardener with a vegetable patch can find some perennial veggies to grow and enjoy.
Vegetable Gardening Resources
- Alameda County Master Gardeners - Growing Your Own Food
- Contra Costa Master Gardeners on Vegetables
- Santa Clara Master Gardeners Vegetable Planting Pages
- Sonoma County Master Gardeners on Vegetables
- California Garden Web on Vegetables
- Golden Gate Gardening, by Pam Peirce, Sasquatch Books, 3d edition, 2010 - available at many libraries!

